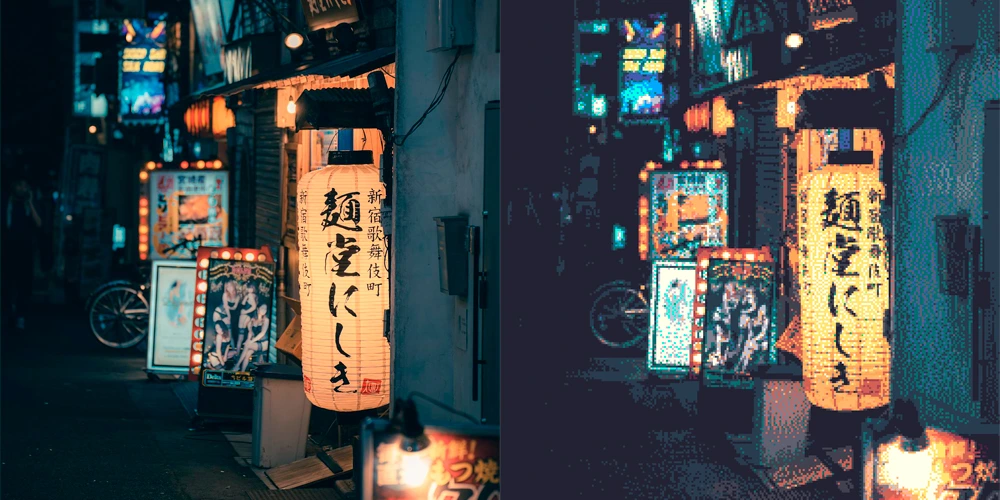
Image to Pixel Art
Create pixel art from images and GIFs - fast and entirely in your browser. Upload or paste a photo link, adjust pixel size, palette, and dithering settings. No AI, no sign-up - just detailed pixel control directly in your browser with export to JPG, PNG, WEBP or GIF.
Transform Any Image or GIF into Pixel Art - All in Your Browser
Bring your images and animations to life in a nostalgic pixel-art style. Whether you want to recreate retro aesthetics, design game sprites, or simply experiment with low-res visuals - this tool gives you full creative control without using AI.
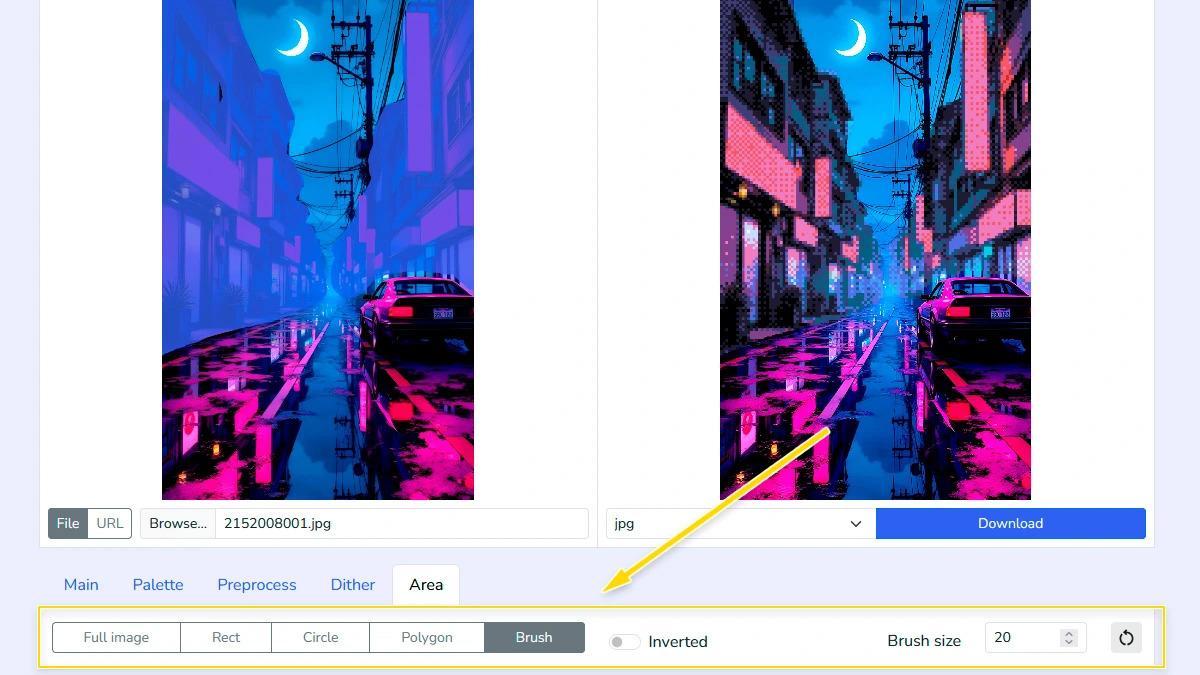
You can upload a photo, an animated GIF or paste a link, then choose how your pixelation will look: apply it to the whole image or a selected area (rectangle, circle, polygon, or brush). You can even invert the selection - so everything except your object becomes pixelated.
Key Features
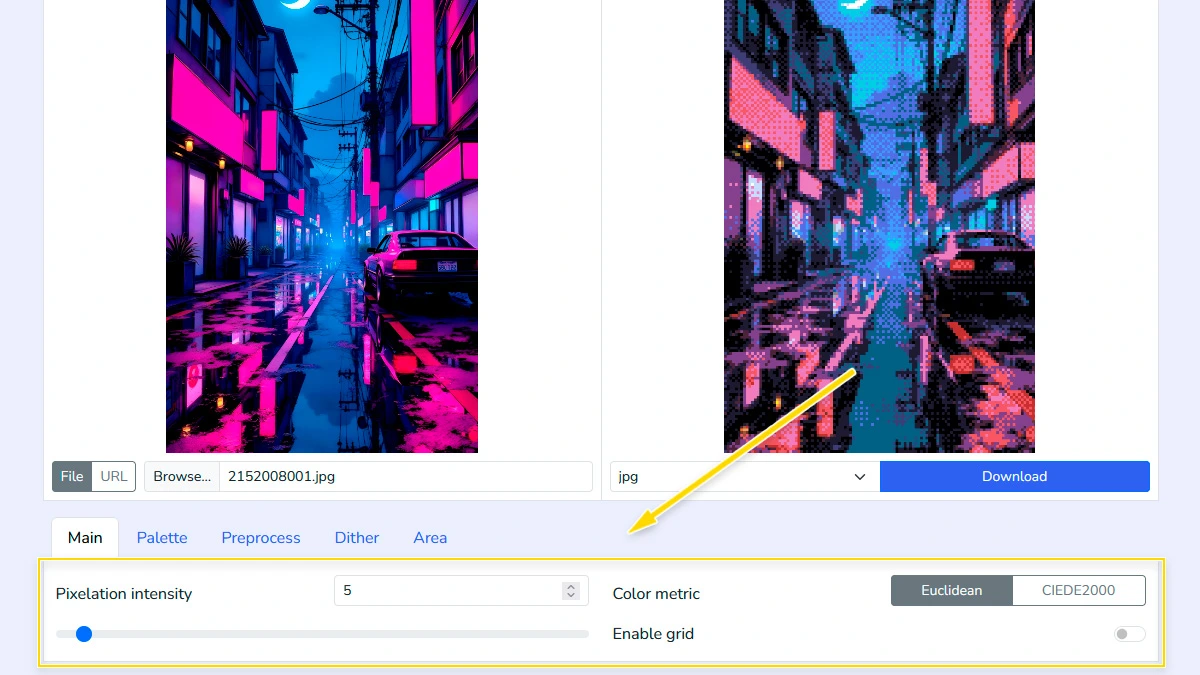
- Pixel Intensity Control: Adjust how coarse or detailed your pixel blocks appear.
- Animated GIF Support: Convert entire animations into pixel art while maintaining the original timing and motion.
- Pixel Grid: You can enable a visible grid between pixels to create a retro monitor effect or simply make the pixel structure more defined.
Color Metrics: Choose between Euclidean and CIEDE2000 color metrics - they define how the tool compares colors when matching your image to a limited palette.
- Euclidean is faster and works well for simple conversions.
- CIEDE2000 is more advanced and closer to how human vision perceives color differences, producing smoother and more natural pixel art results
You can switch between them depending on the style you want - sharper contrast or softer transitions.
- Color Palettes: Use built-in classic palettes (PICO8, DB32, AAP64, ENDESGA, etc.), generate one from your image, or import custom ones from PixilArt and Lospec using .hex or .txt formats. Customize and save your own palette locally for future use.
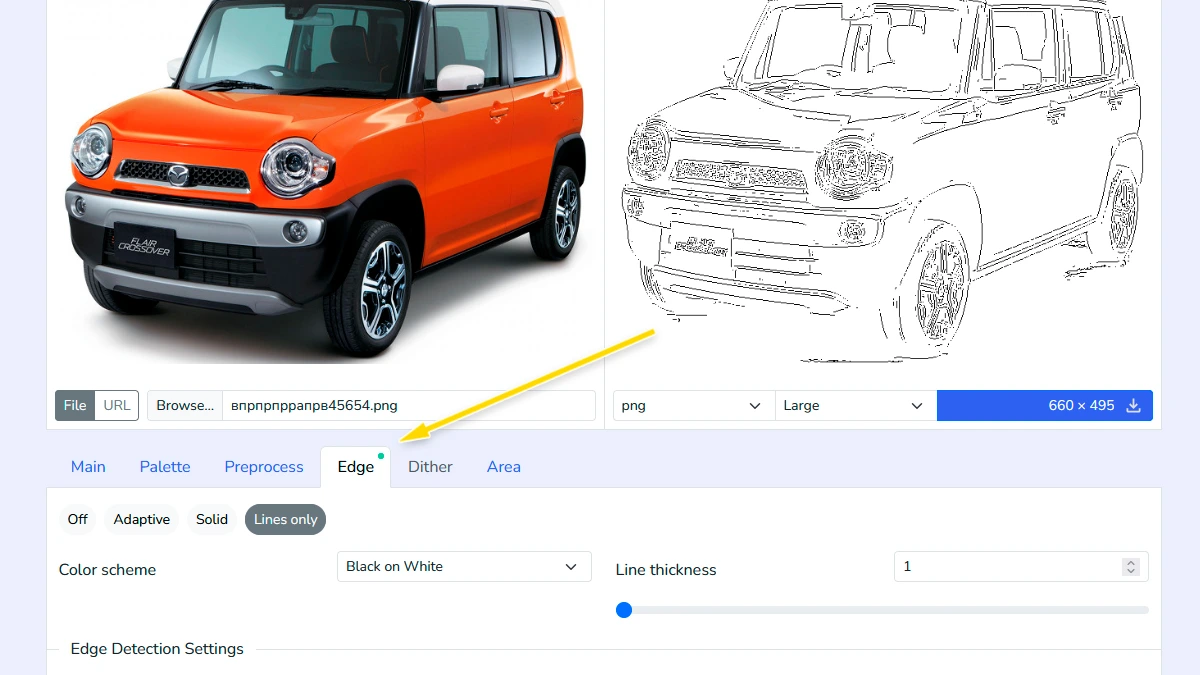
- Edge Detection Engine: Highlight contours using adaptive mode, solid colors, or line-only styles to give your art more definition.
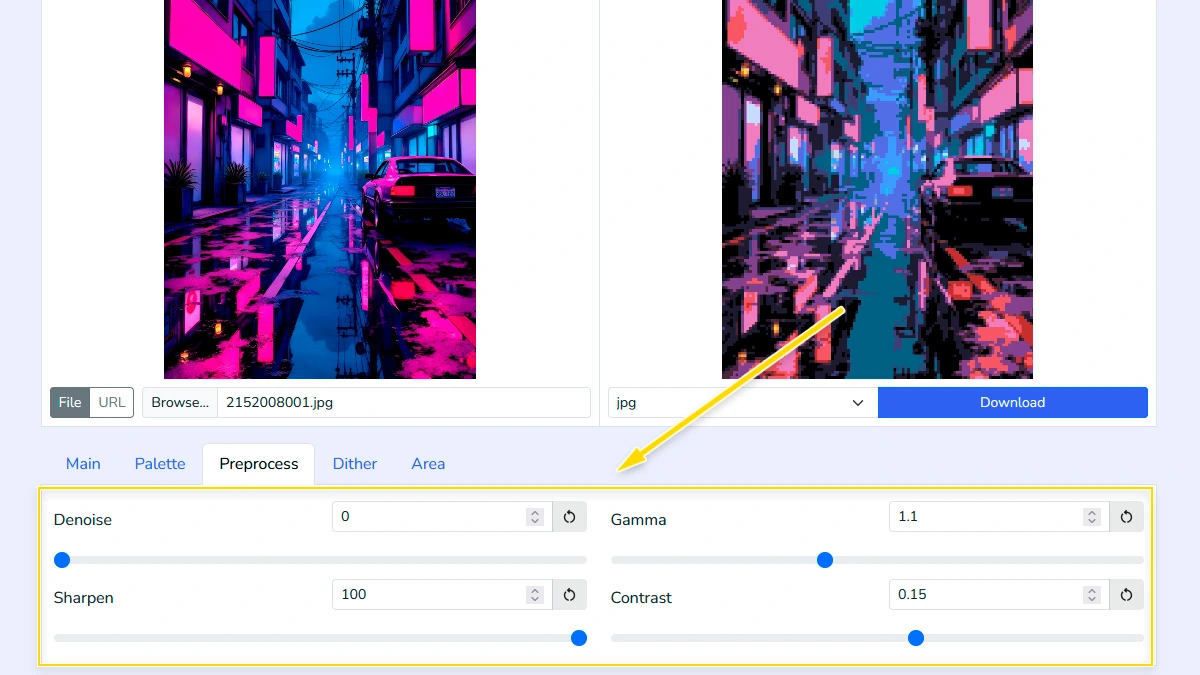
- Preprocessing Tools: Fine-tune your image before pixelation with options like Denoise (reduce artifacts), Sharpen (enhance edges), Gamma, and Contrast adjustments.
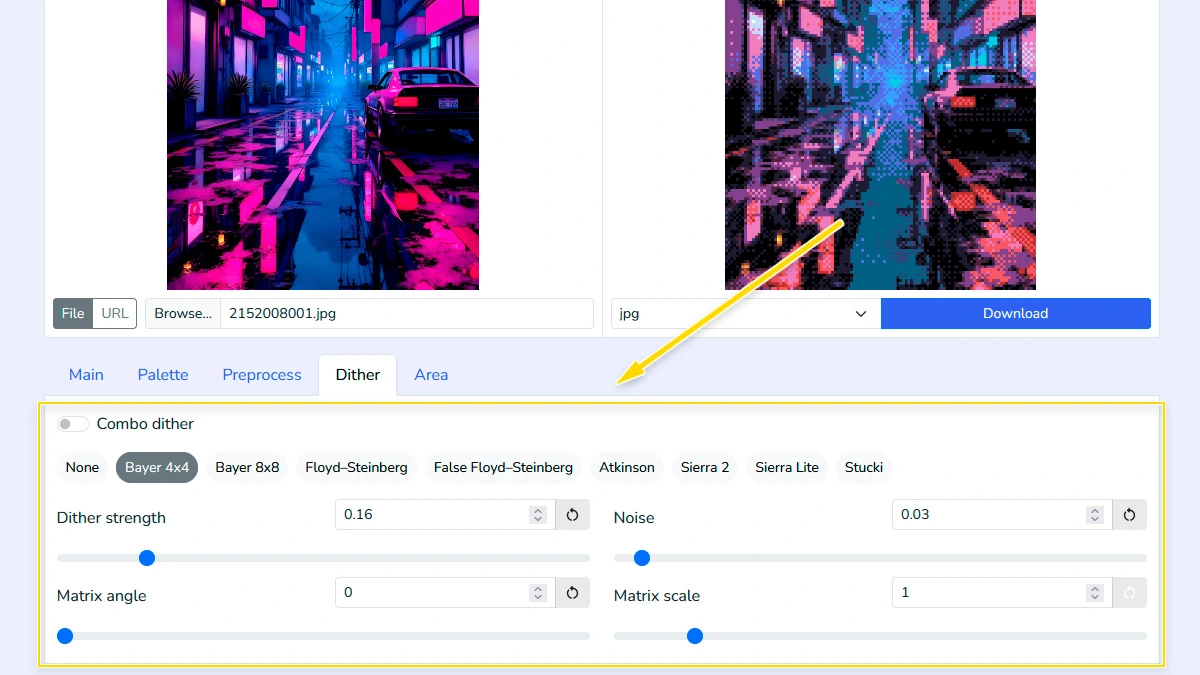
- Dithering Engine: Add natural texture and color blending. Includes algorithms like Bayer4, Bayer8, Floyd, Atkinson, Sierra, Stucki, and more - each with customizable strength, noise, angle, and scale. Combo Dithering allows combining ordered and diffusion methods for even richer results.
- Local Processing: Everything happens in your browser - no uploads, no privacy risks.
When your pixel masterpiece is ready, simply export it as JPG, PNG, WEBP or GIF.
Perfect for designers, pixel artists, indie game creators, or anyone who loves the charm of pixel graphics - no downloads or accounts required.
Where You Can Use Pixel Art
Game Development
Create pixel art sprites, textures, and backgrounds from reference images. Great for indie games, prototypes, or quickly testing visual ideas in a retro style.
Retro & 8-bit Art
Transform modern images into nostalgic 8-bit and 16-bit style visuals. Perfect for retro-themed designs, posters, or creative experiments.
Social Media & Avatars
Turn photos into unique pixel-style avatars and profile pictures. A simple way to stand out with a recognizable and creative look.
How to Convert Image to Pixel Art Online
You want to transform your photos into unique retro styles for game assets or creative design. This tool lets you adjust pixel size, palette, and dithering in seconds. Just upload your image and start customizing in your browser.
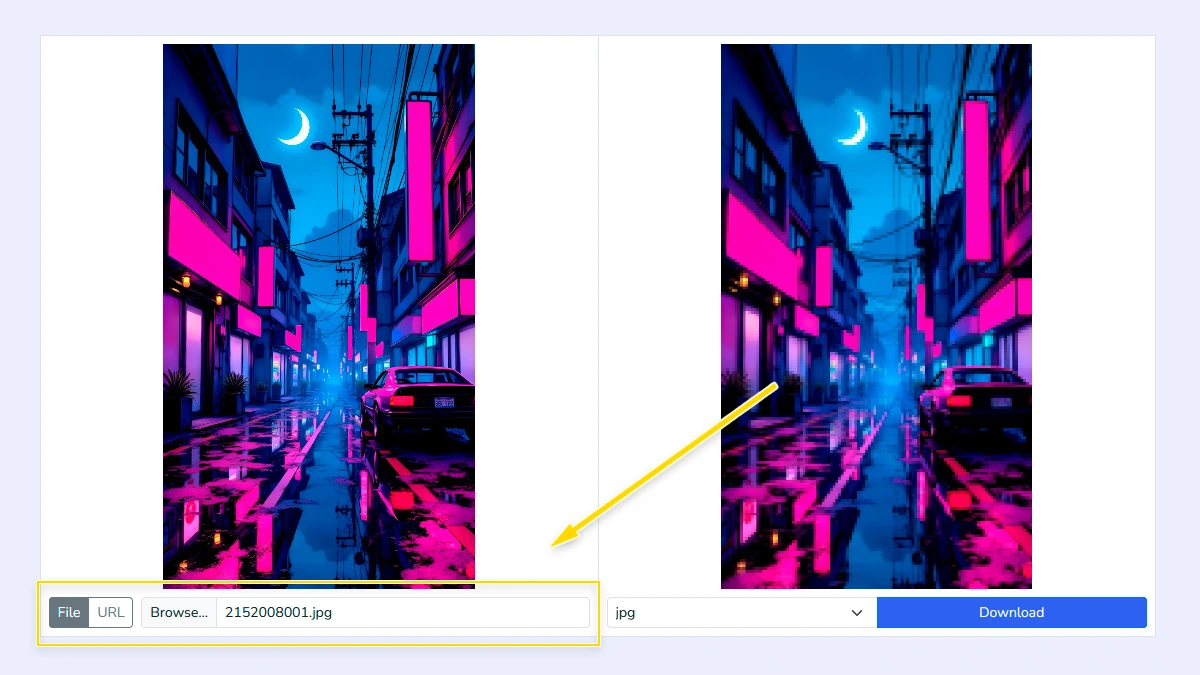
Upload your Image1
Select an image from your computer or paste a direct image URL to start. The tool instantly loads your file locally, so you can preview and edit without any uploads to a server.
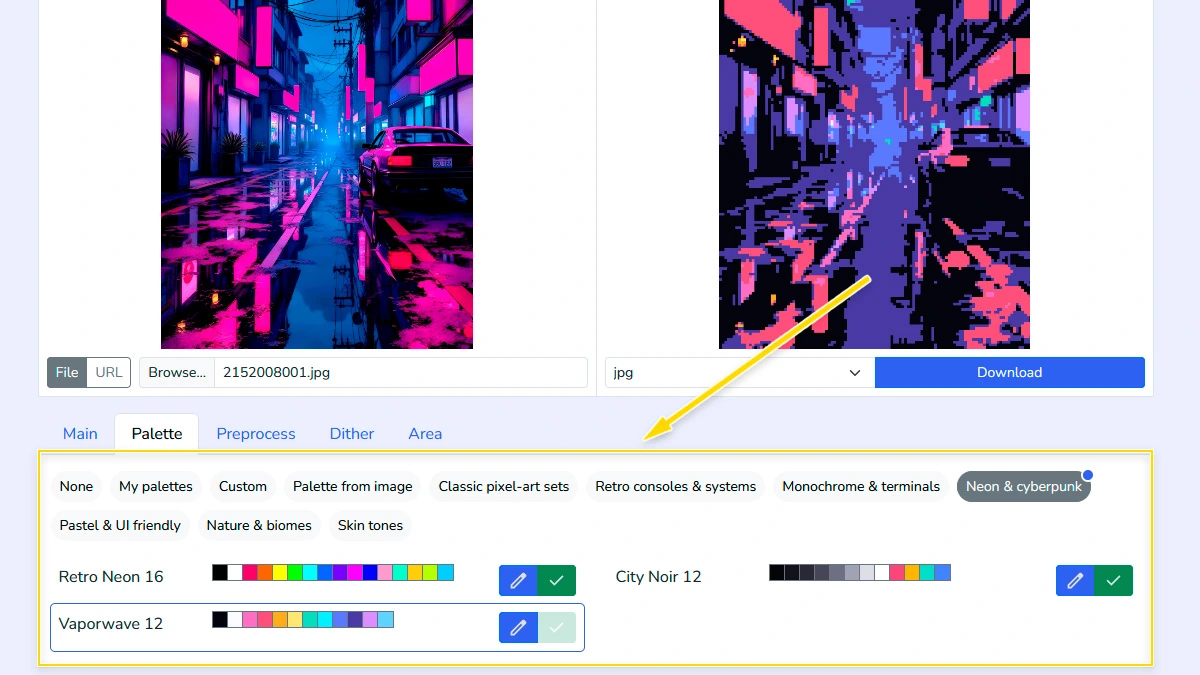
Choose Palette2
Use retro console presets, extract a palette directly from your image, or manually define custom colors. This step defines the overall mood and color depth of your art.
Fine-tune preprocessing3
Adjust Denoise, Sharpen, Gamma, and Contrast before pixelation. These sliders help prepare the source for the most accurate color mapping possible.
Apply Edge Detection (Optional)4
Enhance your artwork by enabling contour lines to give it more definition. Use the adaptive mode to let line colors match the original image automatically, or switch to color mode to select a specific color and adjust its transparency. You can also choose the "only lines" mode for a minimalist look and fine-tune the algorithm parameters to control exactly how the edges are detected.
Configure dithering effect5
Select a dithering algorithm like Bayer, Floyd, or Atkinson and fine-tune strength, angle, noise, and scale. This adds authentic retro texture and helps simulate gradients using a limited color palette.
Set intensity and metrics6
Define pixel size and choose between Euclidean or CIEDE2000 color metrics for better precision. You can also enable or disable grid lines to achieve a sharper or more retro look.
Define processing area (Optional)7
Use Rectangle, Circle, Polygon, or Brush tools to apply pixel art only to a specific part of the image. By default, the tool will automatically process the entire canvas.
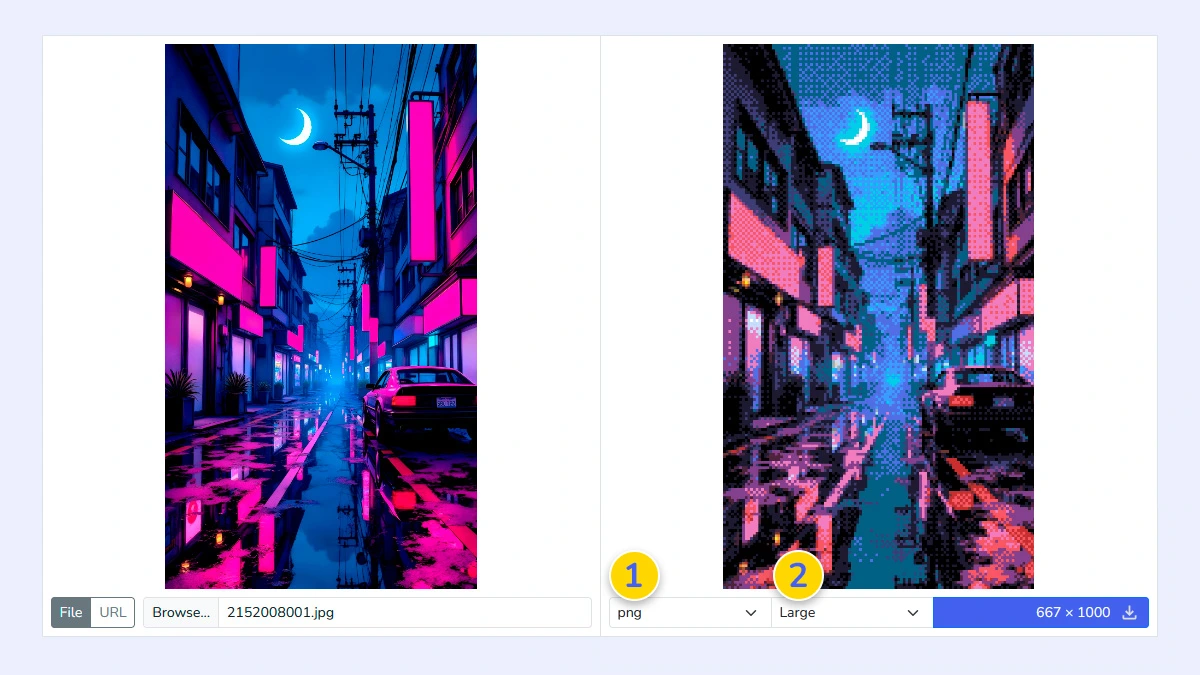
Download Result8
Choose your output format 1 (PNG, JPG, WebP, or GIF) and select the desired scale 2. You can download the art in its original size or choose the "small" option for perfectly scaled-down pixel assets where each block equals one pixel.
FAQ
Which color metric should I choose?
Euclidean is faster, CIEDE2000 gives more accurate and natural color matching.
Does it support transparent backgrounds?
Yes, if you upload a PNG or WebP with transparency and select PNG or WebP as the output format, the transparent areas will be preserved.
Is my image uploaded to a server?
No. Everything is processed locally in your browser.
Is this tool powered by AI?
No. We use deterministic mathematical algorithms for pixelation and dithering, giving you full technical control over every single pixel.
What is dithering and why should I use it?
Dithering helps simulate missing colors in a limited palette by creating noise patterns. It makes gradients look smoother and more authentic to retro hardware.
Can I create my own palette?
Yes, you can manually create a palette or modify the preset ones.
Does it support animated GIFs?
Yes. You can upload GIFs, and the tool will process the animation frame-by-frame into pixel art.
Can I import palettes from other sites?
Yes, you can import .hex and .txt palette formats directly from popular platforms like Lospec and PixilArt.
How does the Edge Detection work and what do the settings mean?
Edge detection finds the boundaries within your image to add crisp outlines. You can fine-tune the results using these parameters:
Greyscale Method: Defines how the tool converts your image to black and white before finding edges. Luma601 and Luma709 use weighted formulas for human-like perception, while Average simply balances all color channels.
Blur Intensity: Softens the image before processing to reduce noise. Higher values help the detector focus on major shapes rather than tiny details.
Detection Thresholds (Low/High): These control which gradients are considered "edges". The High threshold identifies strong edges, while the Low threshold helps connect those lines to maintain continuity.
Kernel Size: Determines the thickness and sensitivity of the detection area. Increasing the size results in bolder, more pronounced outlines.